In a few days (or a few weeks, depending on your exact location), you will be surrounded by the colorful foliage of autumn in the Northern hemisphere. All photographers know that this is a time to bring out the camera and start shooting. But despite this being a subject considered easy, here are a few of the Y-Tips (tips and tricks from YLovePhoto).

Copyright Yves Roumazeilles
- Color: Even if the leaves are already colored, shooting at sunrise or sunset will add a little bit more of colors and it is always more natural than blooming it with a saturation filter in Photoshop.
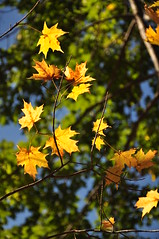
- Color: Green is also a color, so watch for color oppositions.
- Polarizing filter: Reducing the specular light reflexion, some of the colors will be enhanced by the use of a POL-C filter.
- Background: Like always, check your background and if it is not adequate be sure to open the aperture to blur it.
- Speed: If there is wind, even a light one, be sure to push the shutter speed up to fix it.
- Speed: If there is a river, a stream or some other moving object, be sure to push the shutter speed down to blur them.
- Tripod: If you shoot pictures under the trees, you will probably not have enough light for fast speeds, so bring your tripod.
- Water: Leaves look better when covered with some water (it could be rain or some water you brought).
- HDR: Many forest pictures suffer from extreme dark areas and very bright areas (specially when the subject is back-lit). It’s the right moment to try and use HDR (High Dynamic Range) techniques.