
We are handling so many memory cards and USB thumb drives that it is often quite unpleasant to recognize them all. Sometimes, because it is difficult to find them in the photographer bag, sometimes because all these look alike when plugged into our computers.
wouldn’t it be great if we had a simple way to recognize them? Yes, of course. The simpler solution? Put a different name on each drive, each memory card, each USB thumb drive, but this is very small step. We know that graphical interfaces work better. Why not replace all these ugly grey icons with something ore meaningful (and more pleasant)?
A simple process
The only requirements are:
- Access to Google image search (but you can use another one, of course)
- Use of a simple image editor able to save to “Windows .ICO” file format – I use IrfanView which is very feature-rich, but simple to use and perfectly free (as in free beer).
Step-by-step process:
- Define an image which is representing the drive well,
- Collect this picture,
- Set it to the right format,
- Set it up on the USB drive.
Step by step
Define the image for your icon
I recommend several possible and complementary approaches. Keep in mind that the objective is to easily recognize the USB thumb drives or the disk drives connected to the computer USB port(s). Nota bene: This works with internal hard drives too.
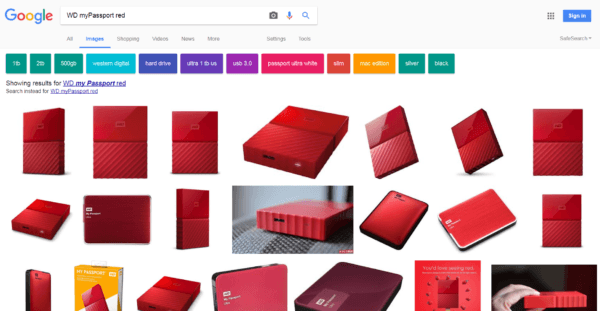
Solution #1: If the USB thumb drive is very recognizable, you can find on the web some good photo representing it nice and well. You can even collect a press release photo form the manufacturer if you have the manufacturer name and the product model. For example, I can look for photos of external hard drives from Western Digital, MyPassport model, red color. Google result is offering a wide choice of good pictures:
It works very well with memory cards. Plenty of good pictures from Sandisk, Lexus, and other manufacturers.
Even if you don’t have the exact name of the thumb drive (not all of Chinese-sourced drives are named properly), it is quite easy to look for a good description like “orange USB drive”. Less precise, somewhat more error-prone, but it works astonishingly well.
Solution #2: With the same Google Image Search, look for a nice photo that would represent the disk contents (or its name). Try looking for “photography” or “black and white photography” or even the name of a famous photographer (I tried with “Man Ray”, “Helmut Newton” who have very symbolic images to offer) for a hard drive to hold your photo archives.
Choice reduction
In front of so many options, I recommend intelligently reducing choice with some specific search filters. (on the Google page, press the “Tools” button and choose the following filters):

- Only take large size images (you’ll see it is important)
- Select public domain pictures that you can modify: “Labeled for re-use with modification” (Why steal a photo? What good photographer would steal the photo of another one? Use a freely available one).
- Most critical: Chose a very simple, pretty but easily recognizable picture (an icon may be very small).
- Last recommendation: It is often better to start from an image with a white or very lightly colored background (it “works” better in most cases, as you will see).
Collect the picture
Download the image from Google.
Create the icon
After all, an icon is merely a square image brought down to a small size and in special ICO format. the walkthrough is rather simple, you’ll see.
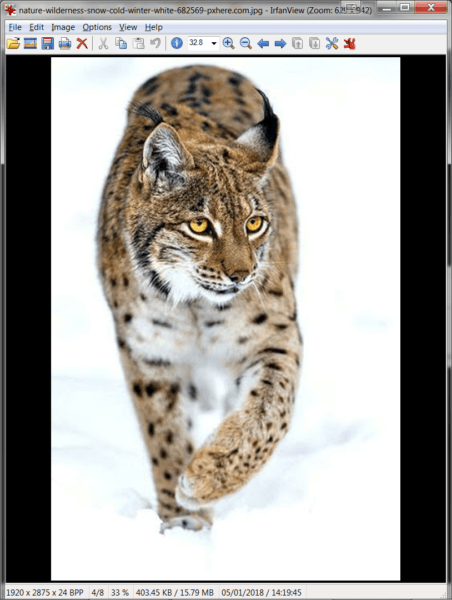
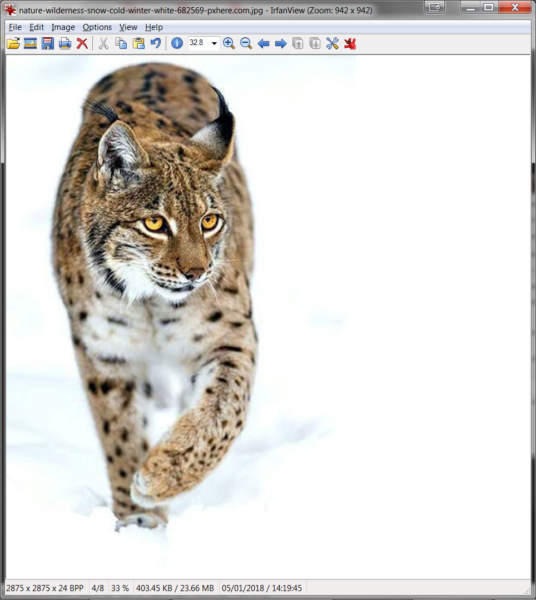
Load the image into the IrfanView application.

Modify the size of the picture to move to a square ratio (change canvas size). You can do it by either enlarging or reducing the canvas size (choosing the right background color).
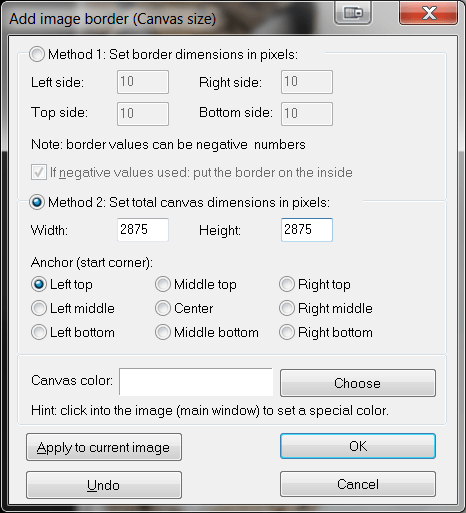
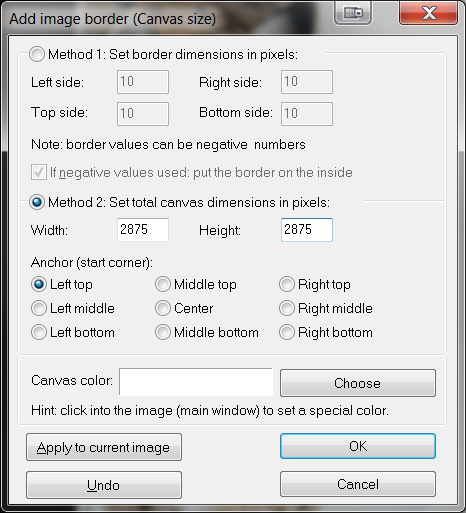
The result should be a nice square picture but you may feel that it is rather large for an icon.

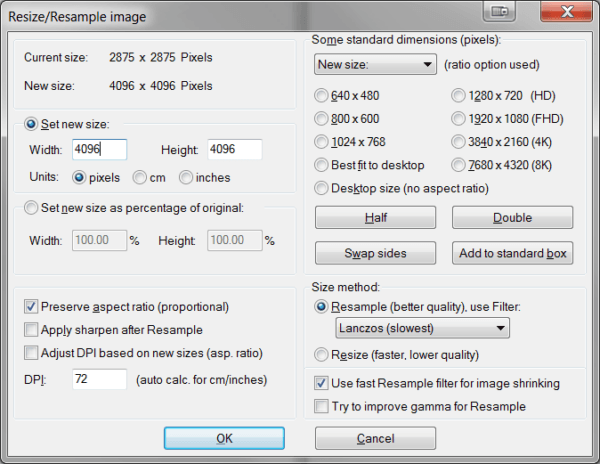
As a matter of fact, size does not matter much here. The larger, the better to keep the icon looking good when changing display sizes. Now comes the time to make sure that the size is exactly a multiple of 2 (eg. 2048×2048 pixels). It is not useful to go further than 4096×4096 pixels, but do not go below 1024×1024 pixels. IrfanView will do this easily, from Image>Resize/resample... menu.

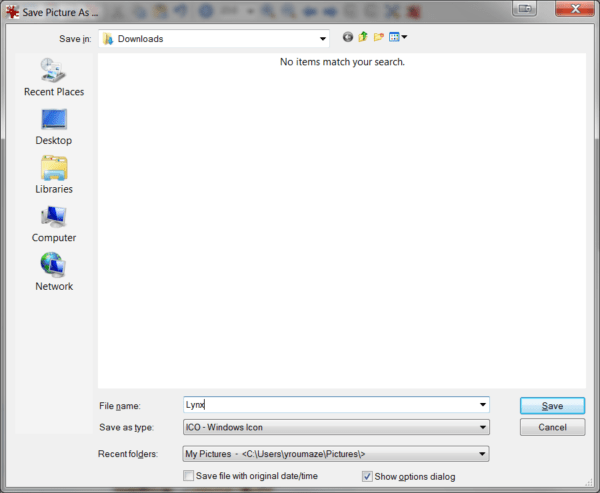
Then, you need to save the picture as .ICO file (be sure to use “Save as type” with the “ICO – Windows icon” option).

Setup on the USB drive
This icon (this ICO file) must be saved at the root of the USB thumb drive (in the D:\ directory), preferably under the autorun.ico name (but we can accommodate any other name like Lynx.ico).
Last, copy or create a text file named autorun.inf with the following contents (also in D:\ directory), :
[autorun]

ICON="autorun.ico"
This small file will allow Windows finding the icon named autorun.ico (or any other name that you previously chose)).
One comment about memory cards: You can do the same for your SD or CF Flash memory cards. Just remember that this will disappear any time you format the card in the camera. Have a copy handy to put it back on the Flash card.
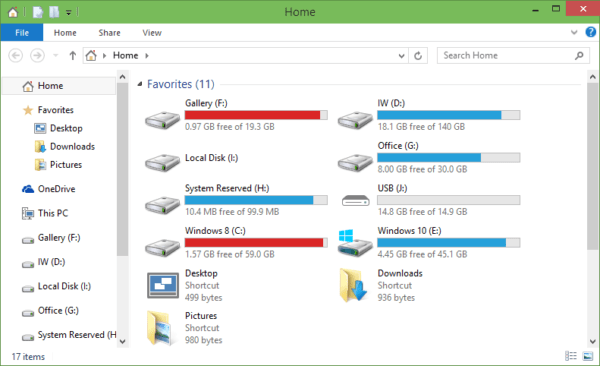
Result
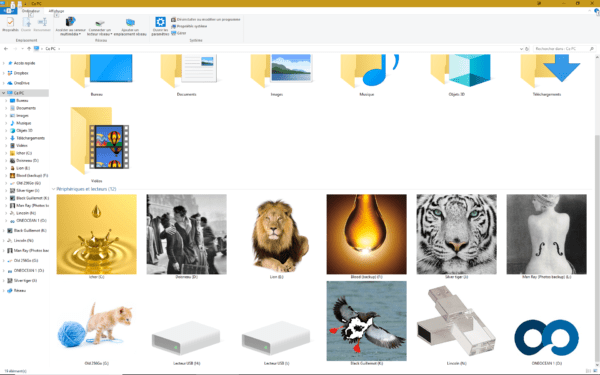
After that, your icons will be perfectly distinguishable. Only empty slots are exhibiting the default ugly non-images. All the rest is animal pictures, photographs from major artisits (Doisneau and Man Ray), pictures of the thumb drive actually used, etc.
Bonus: This is applicable to your company logo (see the example above). If you give USB thumb drives away, better than putting any photo, install your company logo for a fully personalized thumb drive! If you are a wedding photographer selling digital photos on a USB thumb drive, this is a minor improvement to have the drive look more professional than ever.